8 Tips to Prepare Your Furnace for Winter
August 23, 2023
Before winter takes over, homeowners must proactively ensure their furnace and home are fully prepared before outside temperatures plummet below freezing.
Freezing temperatures are common throughout the Midwest, particularly in Kansas City. If you’re wondering how to prepare your furnace for winter, keep reading. Keep in mind that trying to DIY some of these steps could void the manufacturer’s warranty on your equipment, and could even be dangerous for yourself and your home.
Don’t risk your health and safety—leave your furnace maintenance to us! The team at Hamilton will ensure your furnace is ready to meet your heating demands through winter’s harshest months.
Schedule your furnace maintenance appointment today.
Table of Contents
How to Prepare Your Furnace for Winter Weather
- Conduct a Visual Inspection
- Have a Professional Clear the Drainage Tube
- Replace Air Filters
- Clean Ducts and Air Vents, Dust and Vacuum
- Clean the Flame Sensor
- Inspect the Blower Belt
- Inspect the Exhaust Flue
- Set a Lower Temperature on Your Thermostat
Other Ways to Prepare Your Home for Winter
- Test Carbon Monoxide Detectors
- Clean and Cover the Condensing Unit
- Insulate Exposed Pipes
- Turn off the Water Supply to Exterior Faucets
- Insulate Hot Water Heater
- Check Old Windows for Air Leaks
- Inspect the Roof
Don’t Take Chances—Call an Expert
How to Prepare Your Furnace for Winter Weather
Here are eight ways you can prepare your furnace for winter:
1. Conduct a Visual Inspection
Look for holes, cracks, or defects in the ductwork which could allow dangerous waste gases to reenter your home. Check the outside ventilation cap to ensure it’s free of debris and blockages.
If you notice any water stains on metal exhaust pipes, you could have moisture condensation within the flue. Or you might lack a proper flue cap, resulting in rain or snow making its way inside the chimney.
If you see anything out of the ordinary, or if you’d like a professional safety inspection to be sure nothing is wrong, give us a call.
2. Have a Professional Clear the Drainage Tube
First, the technician will turn off power to the HVAC system at the breaker and the thermostat. Then, they will clean the condensate drain outlet. Next, the technician will clean the condensate pan by flushing the drain and removing debris.
The pros at Hamilton are here to help you get this done safely. Get in touch with us today.
3. Replace the Air Filter
This is one step you can do yourself. The air filter keeps dust, pollen, pet dander, and other particulates out of your home. Over time, it gets covered in layers of dust, inhibiting airflow. It’s important to get in the habit of replacing the air filter before you turn on the heat.
Your options for air filters include:
-
Fiberglass/synthetic filters
-
Polyester filters
-
Electrostatic filters
-
Pleated filters
-
HEPA filters
Before purchasing a new filter, check the size and type of your current filter. A poorly fitting replacement filter could damage your system and negatively impact airflow.
Reach out to Hamilton Plumbing, Heating, A/C & Rooter to learn more about the different types of filters, and the pros and cons of each one.
4. Clean Ducts and Air Vents, Dust and Vacuum
A professional tune-up should include cleaning the supply and return air registers with a wet rag or vacuum, and moving or adjusting any furniture blocking airflow. The pros at Hamilton are equipped with specialty vacuums and long hoses for heavy-duty cleaning. Cleaned vents will help minimize dust entering your home’s air supply.
You can remove the registers to sweep out the dust and debris within the duct system yourself. You can also clean the registers with a vacuum or a damp rag, or by rinsing them with water and drying them thoroughly with a microfiber cloth or clean paper towel.
5. Clean the Flame Sensor
A flame sensor is a thin metallic rod located in front of the flame stream inside the furnace. It helps prevent a dangerous buildup of unburned gas. Here’s how it works:
Upon ignition, the sensor identifies the flame and transmits an electrical signal to the furnace's control board, indicating proper functionality. If it doesn’t detect a flame, it doesn’t signal the control board, shutting down the furnace shortly after the gas valve opens.
Over time, a flame sensor can become dirty from carbon buildup. Your professional HVAC technician will clean the sensor by gently rubbing the metal rod with light grit sandpaper. They will then use a clean paper towel to remove any remaining dust.
6. Inspect the Blower Belt
When your furnace turns on, it first needs to heat the air that will blow through your home. When the air is warmed, the blower motor teams up with the blower fan, which pushes the warm air through your ducts and into each room of your home. Issues with the blower belt, which connects these two components, can disrupt this process.
Before inspecting the blower belt, the technician will turn off the power to your HVAC system at the main circuit breaker. Next, they will remove the steel cover of the air handler to look for any cracks in the blower belt that may need to be fixed.
7. Inspect the Exhaust Flue
Your furnace flue pipe releases exhaust gasses and other combustion byproducts into the atmosphere outside your home. This pipe is made of metal and covered with insulating material. A professional should inspect the exhaust flue outdoors to make sure nothing covers the opening.
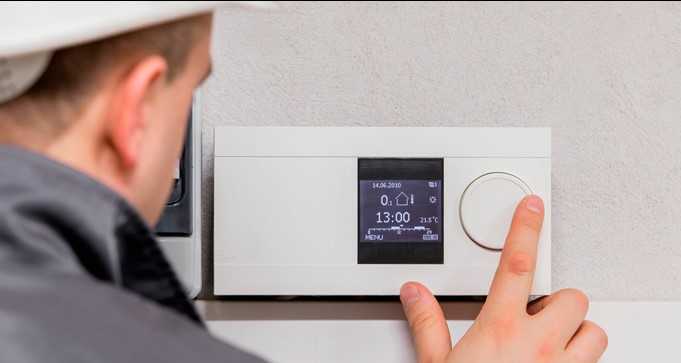
8. Set a Lower Temperature on Your Thermostat
If you want to save on utility bills this winter, set your thermostat to a lower temperature when you’re away. You can also do this when you sleep, wearing layers at night to give the furnace a break.
If you suspect any serious issues with your furnace, need a heater repair, or have any additional questions, reach out to Hamilton Plumbing, Heating, A/C & Rooter to schedule a safety inspection.
7 Other Ways to Prepare Your Home for Winter
In addition to preparing your furnace for winter, here are seven other steps you should take to ensure your home is ready for freezing weather:
1. Test Carbon Monoxide Detectors
Regularly testing your carbon monoxide alarms is vital to the safety of everyone in your home, including pets. To perform the test, simply press and hold the test button on the device. During the test, the detector will emit four beeps, followed by a brief pause and then another four beeps lasting 5–6 seconds.
For detailed instructions tailored to your specific model, consult the user manual. If your alarm fails the test, take the following steps:
-
Install new batteries
-
Ensure correct battery placement
-
Clean the alarm to remove any dust
Then, conduct the test again. If the issue persists, replace the carbon monoxide detector immediately.
2. Clean and Cover the Condensing Unit
An uncovered condensing unit can be damaged by wet leaves and debris. This leads to rust and freezing of the internal components.
Use a hose with a spray head to remove dirt and debris from the fan blades and condensing coils. Give the unit enough time to dry before covering it for winter.
Only cover the top of your condenser. With the humid Kansas air, tightly wrapping up the unit can lead to moisture getting trapped inside, leading to issues like rust and mold. In addition, it can invite rodents to nest there, which can cause significant damage.
3. Insulate Exposed Pipes
Exposed water pipes in uninsulated spaces, such as a crawl space, attic, or exterior wall, can freeze in cold temperatures, potentially leading to a crack. Make sure any exposed pipes are insulated before winter. Covering pipes with strips of pipe wrap is the most common way to do this.
Check out our recommendations for more ways to protect your plumbing system in the winter.
4. Turn off the Water Supply to Exterior Faucets
Outdoor faucets in your front or backyard should not be dripping water in the dead of winter. Be sure to drain water from them by opening up the exterior faucets. Disconnect and drain the garden hoses as well.
5. Insulate the Hot Water Heater
Use an insulating blanket to cover the water heater and prevent damage from extreme temperatures.
6. Check Old Windows for Air Leaks
Traditional glazing putty holding the glass panes in the frame may crack and fall out over time, leaving space for cold air to creep into your home. To seal air leaks, have your windows reglazed. This will help improve your home’s heating efficiency and reduce energy bills.
7. Inspect the Roof
Check the roof for missing or damaged shingles and any signs of leaks—especially after tornado season, when your home has withstood high-powered winds. Take care of repairs as soon as you can to prevent further damage.
Don’t Take Chances—Call an Expert
You can take many steps to prepare your furnace and home for winter. While you can handle some of them yourself, for others it’s essential to call a professional. Never do anything that will void the warranty on your equipment.
When in doubt, call Hamilton at (913) 227-4943 or visit one of our locations near you. Let us help you safely prepare your home for winter weather.
For more ideas on keeping your home warm this winter, read our guide on heating options.
Last Updated: April 02, 2024